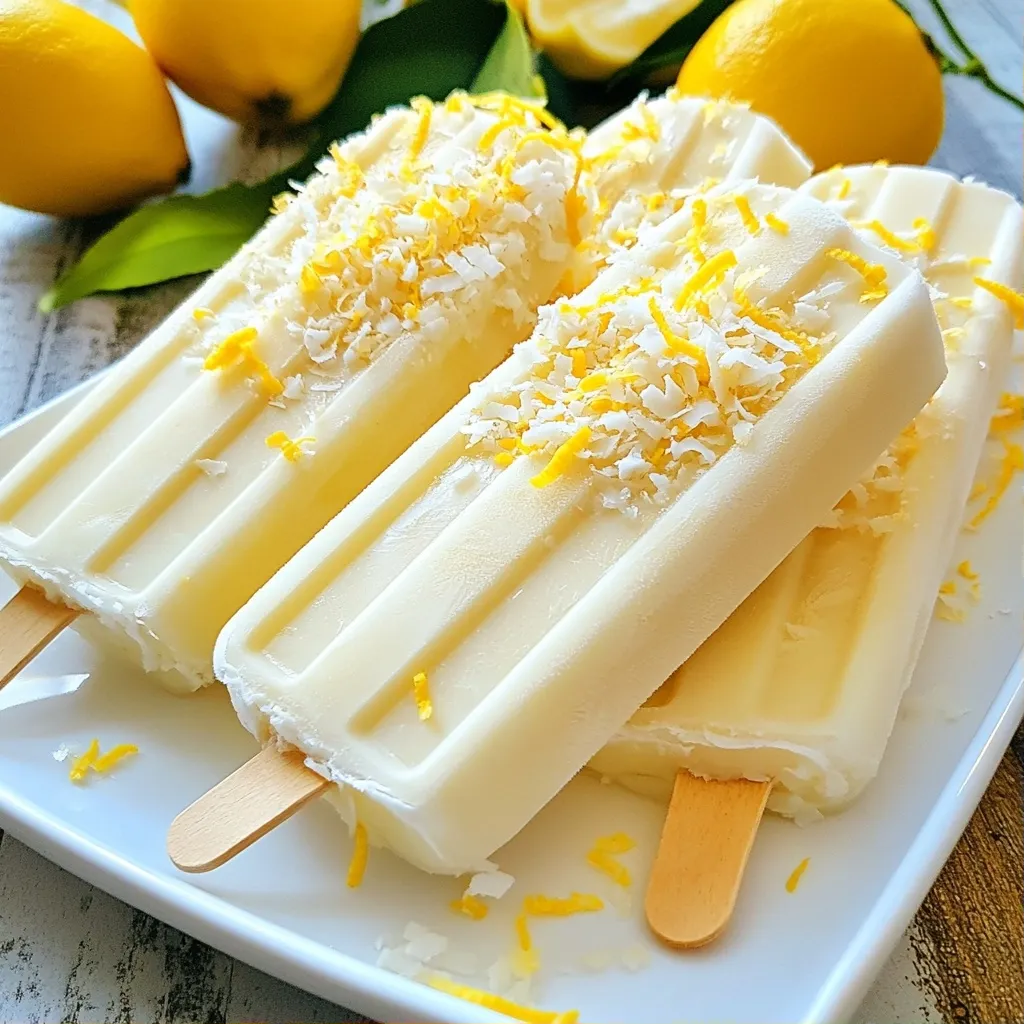
Are you ready to beat the heat with a fun treat? My Lemon Coconut Popsicles are the perfect blend of zesty lemon and creamy coconut. With just a few simple ingredients, you can create a refreshing dessert that will impress everyone. Whether you're craving a cool snack or looking for a fun project, this recipe has you covered. Let’s dive into the details and make your summer delicious!
Why I Love This Recipe
- Refreshing Flavor: The combination of lemon and coconut creates a bright and refreshing taste that is perfect for hot days.
- Simple Ingredients: Made with just a few wholesome ingredients, this recipe is easy to whip up and customize.
- Healthy Treat: Using coconut milk and natural sweeteners makes these popsicles a guilt-free dessert option.
- Fun to Make: Creating popsicles is a fun activity for kids and adults alike, making it a great family project.
Ingredients
Key Ingredients Breakdown
This recipe for lemon coconut popsicles uses simple, fresh items. Here are the key ingredients:
- Coconut milk: I like to use full-fat for a creamy texture.
- Fresh lemon juice: You’ll need about 3-4 lemons for half a cup.
- Honey or maple syrup: Use a quarter cup, but adjust to your taste.
- Lemon zest: Zest from 2 lemons adds a bright flavor.
- Shredded unsweetened coconut: Half a cup gives great texture.
- Pinch of salt: This enhances all the flavors in the popsicles.
Measurement Details
When measuring, be precise to get the best popsicles. Use a liquid measuring cup for coconut milk and lemon juice. For honey or maple syrup, a dry measuring cup works best. Zest the lemons before juicing to keep it easy. If you want more coconut flavor, add a bit more shredded coconut.
Substitutions and Alternatives
You can tweak the recipe to suit your taste. Here are some options:
- Coconut milk: Use almond milk or oat milk if you prefer.
- Sweeteners: Agave syrup or stevia can replace honey or maple syrup.
- Coconut: Try using finely chopped nuts for a different texture.
- Lemon juice: Lime juice can give a fun twist to the flavor.
Feel free to mix and match these ingredients to create your own unique popsicle!
Step-by-Step Instructions
Preparation Steps
1. Start with a mixing bowl.
2. Whisk together 1 cup of coconut milk and 1/2 cup of fresh lemon juice.
3. Add 1/4 cup of honey or maple syrup. You can adjust this based on your taste.
4. Mix in the zest of 2 lemons and a pinch of salt. This adds great flavor!
5. Stir in 1/2 cup of shredded unsweetened coconut. This gives your popsicles a nice texture.
6. Once mixed, pour the mixture into popsicle molds. Leave a little space at the top.
7. Insert popsicle sticks into the molds and place them in the freezer.
Freezing Techniques
- Freeze the popsicles for at least 4-6 hours. They need to be completely solid.
- For best results, place the molds in the back of the freezer. This keeps them colder.
- Avoid opening the freezer often. Each time you open it, warm air can affect the freezing.
Tips for Removing from Molds
- To release the popsicles, run warm water over the outside of the molds.
- Do this for a few seconds to help loosen them.
- Gently pull the popsicles out. If they do not come out, try running the water a bit longer.
- Serve your popsicles on a colorful plate. Garnish with lemon zest and shredded coconut for style.
Tips & Tricks
Enhancing Flavor and Texture
To boost the taste of your lemon coconut popsicles, use fresh lemons. Fresh juice gives a bright flavor. Zest adds a strong lemon aroma that makes these popsicles stand out. For creaminess, always use full-fat coconut milk. This will give your pops a rich, smooth texture. You can add a pinch of vanilla extract for extra depth. It blends well with the lemon and coconut.
Common Mistakes to Avoid
One mistake to avoid is not measuring the honey or maple syrup correctly. Too much can make your popsicles overly sweet. Always taste the mixture before pouring it into molds. Another common error is over-filling the molds. Leave a small space at the top. The mixture expands when frozen, and this will prevent spills. Lastly, don’t forget to stir the shredded coconut in well. It should be evenly spread for the best texture.
How to Serve and Present
Serving your popsicles can be fun! Use a colorful plate to make them pop. A rustic wooden board adds a nice touch too. Garnish each popsicle with a sprinkle of lemon zest and shredded coconut. It makes each one look fancy. If you want, add fresh mint leaves for a splash of green. The visual appeal will impress your family and friends. Enjoy your delicious, refreshing treat!
Pro Tips
- Use Fresh Lemons: For the best flavor, choose fresh, ripe lemons. This will enhance the tartness and brightness of your popsicles.
- Adjust Sweetness: Depending on your preference and the tartness of the lemons, feel free to adjust the amount of honey or maple syrup to suit your taste.
- Full-Fat Coconut Milk: Using full-fat coconut milk will give your popsicles a creamier texture, making them more indulgent and satisfying.
- Experiment with Add-ins: Consider adding in extras like berries or nuts for added flavor and texture. This can make each popsicle unique!
Variations
Fruit Add-Ins Ideas
You can make these lemon coconut popsicles even better with fruit. Here are some tasty ideas:
- Berries: Add fresh raspberries, blueberries, or strawberries for a pop of color and flavor.
- Mango: Blend in some fresh or frozen mango for a tropical twist.
- Pineapple: Try adding crushed pineapple for extra sweetness and a bright taste.
- Banana: Mash a ripe banana into the mix for creaminess and natural sweetness.
Mix and match these fruits to find your favorite combo!
Dairy-Free Options
If you want to keep these popsicles dairy-free, you’re in luck! The main ingredient, coconut milk, is already dairy-free. Here are a few more ideas:
- Nut Milk: Use almond or cashew milk for a different flavor. These can add a nice nutty taste.
- Oat Milk: This is creamy and works well with lemon and coconut.
- Soy Milk: This option is thicker and can enhance the creaminess of your popsicles.
All of these options keep the popsicles delicious and dairy-free!
Sweetener Alternatives
You can adjust the sweetness to your liking. Here are some great alternatives to honey or maple syrup:
- Agave Nectar: This sweetener is light and has a mild flavor. Use it in the same amount as honey.
- Stevia: This is a natural sweetener. Use it in small amounts because it is very sweet.
- Coconut Sugar: This sweetener has a caramel flavor. You can use it in place of honey for a different taste.
Feel free to experiment with these options to find the perfect sweetness for your popsicles!
Storage Info
How to Store Leftover Popsicles
To store leftover popsicles, wrap them in plastic wrap. You can also put them in a freezer-safe bag. This keeps them fresh and prevents freezer burn. Make sure to label the bag with the date. This helps you keep track of how long they’ve been stored.
Shelf Life and Best Practices
These lemon coconut popsicles last up to three months in the freezer. For the best taste, try to eat them within one month. After that, they may lose some flavor. Keep your freezer at 0°F (-18°C) for optimal storage. This helps maintain the perfect texture and taste.
Re-freezing and Thawing Tips
If you need to re-freeze a popsicle, do so carefully. It is best to eat them once they are thawed. If you must re-freeze, place them back in the molds before putting them in the freezer. When thawing, run warm water over the outside of the molds for a few seconds. This makes it easier to remove the popsicles.
FAQs
Can I use different fruits?
Yes, you can use other fruits! Strawberries, mangoes, or blueberries work well. Just make sure to adjust the lemon juice to keep the taste bright. Blend the fruit with coconut milk for a smooth mix.
How do I make these popsicles vegan?
To make these popsicles vegan, use maple syrup instead of honey. This simple swap keeps the sweetness and makes it plant-based. The coconut milk already makes it dairy-free.
What is the best way to blend the ingredients?
I recommend using a blender for a smooth texture. Start with the coconut milk and lemon juice first. Then, add the honey or maple syrup, lemon zest, and salt. Blend until creamy, then mix in the shredded coconut by hand.
How long do popsicles last in the freezer?
Popsicles can last about 2 to 3 months in the freezer. Make sure to keep them in an airtight container or wrap them tightly. This helps them stay fresh and tasty!
In this post, we covered key ingredients, steps, and tips for making popsicles. You learned about measurements, substitutions, and how to enhance flavors. We also discussed freezing techniques and storage tips. Remember, you can customize your popsicles with fruit add-ins and sweetener alternatives. Always aim to avoid common mistakes for the best results. Now you're ready to create tasty popsicles that impress! Enjoy making your own cool treats.