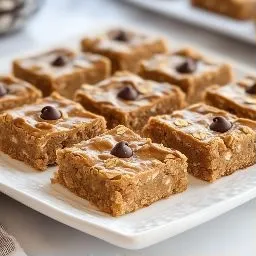
Get ready for a sweet treat that’s both simple and delicious! My easy-to-make peanut butter bars combine creamy peanut butter with rich chocolate for a dessert that everyone will love. In this post, I'll walk you through the key ingredients, step-by-step instructions, and helpful tips that ensure your bars turn out perfect every time. Let’s dive in and whip up a batch you can't resist!
Why I Love This Recipe
- Easy to Make: With just a few simple ingredients and minimal prep time, these peanut butter bars come together quickly, making them perfect for any occasion.
- Healthy Indulgence: These bars are made with wholesome ingredients like oats and natural sweeteners, offering a guilt-free treat that satisfies your sweet tooth.
- Customizable: You can easily modify the recipe by adding nuts, dried fruits, or using different types of nut butters for a unique twist every time.
- Great for Meal Prep: These bars keep well in the fridge, making them an excellent option for healthy snacks throughout the week.
Ingredients
Necessary Ingredients for Peanut Butter Bars
To make delicious peanut butter bars, you need a few key ingredients. Here’s what you should gather:
- 1 cup creamy peanut butter
- 1/2 cup unsweetened almond milk (or any milk of choice)
- 1/2 cup honey or maple syrup
- 1/4 cup coconut oil, melted
- 2 cups rolled oats
- 1/2 cup chocolate chips (dark or milk chocolate)
- 1/2 teaspoon vanilla extract
- Pinch of salt
These ingredients create a rich, nutty flavor and a chewy texture. The peanut butter gives the bars their name, while honey or maple syrup adds sweetness.
Optional Ingredients for Customization
You can also add a few optional ingredients to make these bars your own:
- Chopped nuts (like almonds or walnuts) for added crunch
- Dried fruits (like cranberries or raisins) for sweetness
- A sprinkle of cinnamon for warmth
- Protein powder to boost nutrition
These extras let you personalize your bars to fit your taste. You can mix and match to create your favorite flavor.
Equipment Needed for Preparation
To make the peanut butter bars, you’ll need some basic kitchen tools:
- An 8x8 inch square baking pan
- Parchment paper for easy removal
- A large mixing bowl for wet ingredients
- A separate bowl for dry ingredients
- A whisk for mixing
- A spatula for spreading the mixture
Having these tools ready will make your baking process smooth and fun. You’ll enjoy every step of creating these tasty treats!
Step-by-Step Instructions
Preparing the Baking Pan
Start by lining an 8x8 inch baking pan with parchment paper. Leave some paper hanging over the edges. This will help you lift the bars out later. Make sure the paper fits snugly in the corners.
Mixing Wet Ingredients
In a big bowl, add 1 cup of creamy peanut butter, 1/2 cup of almond milk, and 1/2 cup of honey. You can also use maple syrup if you prefer. Next, pour in 1/4 cup of melted coconut oil and 1/2 teaspoon of vanilla extract. Whisk everything together until it's smooth and creamy.
Combining Dry Ingredients
In another bowl, mix 2 cups of rolled oats with a pinch of salt. Then, add half of the chocolate chips to this mixture. This step gives the bars a nice texture and flavor.
Folding in Chocolate Chips
Now, slowly add the dry mix to the wet mix. Stir it well. The mixture will be thick, and that’s okay! Once combined, gently fold in the rest of the chocolate chips. This makes sure every bite has delicious chocolate.
Chilling the Bars
Pour the mixture into your prepared pan. Use a spatula to spread it evenly and press it down firmly. Now, place the pan in the refrigerator. Let it chill for at least 1-2 hours. This helps the bars set up nicely.
Serving Suggestions
Once the bars are firm, lift them out of the pan using the parchment overhang. Cut them into small squares or bars. For a fun touch, arrange them on a nice platter. You can sprinkle cocoa powder on top and add a few extra chocolate chips for a great look. Enjoy your tasty treat!
Tips & Tricks
Best Practices for Mixing Ingredients
Start with a large bowl for mixing. Use a whisk for wet ingredients. This helps blend everything well. Mix until all lumps are gone. For dry ingredients, use a separate bowl. This keeps the oats and chocolate chips even. When adding dry to wet, do it slowly. Stir gently to avoid splashing. You want a thick, sticky mix, not a runny one.
How to Achieve the Perfect Texture
To get the right texture, focus on the balance of ingredients. The creamy peanut butter adds smoothness. The oats give it a hearty bite. Make sure the coconut oil is melted. This helps the mix come together. A little pinch of salt brings out the flavors. If it's too dry, add a splash more almond milk. If it's too wet, add a bit of oats.
Tips for Even Chilling
Chilling the bars is key to a good set. Spread the mixture evenly in the pan. Use a spatula to press it down firmly. This helps the bars hold together. Cover the pan with plastic wrap. This prevents moisture loss. Chill for at least two hours. For the best results, overnight chilling is great. This way, they slice beautifully.
Pro Tips
- Use Room Temperature Ingredients: Allow your peanut butter and coconut oil to come to room temperature before mixing. This ensures a smoother batter and better incorporation of all ingredients.
- Experiment with Nut Butters: Feel free to substitute the creamy peanut butter with almond butter or cashew butter for a unique flavor twist while maintaining the same consistency.
- Add Texture: Incorporate chopped nuts or seeds into the mixture for added crunch and nutritional benefits. Almonds or sunflower seeds work particularly well.
- Chill Longer for Firmer Bars: For even firmer bars, allow them to chill for longer than 2 hours. This helps achieve a perfect texture for slicing.
Variations
Nut-Free Option: Substitute Peanut Butter
If you want a nut-free treat, you can swap peanut butter for sunbutter or soy nut butter. Both options provide a similar creamy texture and taste. You can use the same amount, one cup, for the best results. This choice keeps the bars safe for those with nut allergies.
Add-Ins for Flavor Boost
To make these bars even more exciting, consider adding fun ingredients. You can mix in:
- 1/2 cup of dried fruit, like raisins or cranberries
- 1/4 cup of shredded coconut for a tropical touch
- 1/4 cup of chopped nuts, like almonds or walnuts, if you like crunch
These add-ins can give the bars extra flavor and texture. Feel free to experiment with what you love!
Dietary Modifications: Gluten-Free and Vegan Options
To make the bars gluten-free, ensure you use certified gluten-free oats. This small change makes the bars safe for those avoiding gluten.
For a vegan version, switch honey for maple syrup. This keeps the sweetness while making it plant-based. You can also use any non-dairy milk, like oat or soy milk, to keep it vegan-friendly. These modifications help everyone enjoy a tasty treat!
Storage Info
Best Practices for Storing Peanut Butter Bars
Store your peanut butter bars in an airtight container. This keeps them fresh and tasty. Place parchment paper between layers to prevent sticking. Make sure to keep them in a cool, dry place. If you want them to last longer, the fridge is a great option.
How Long Do They Last?
These peanut butter bars stay fresh for about one week in the fridge. If you keep them at room temperature, they last for about three days. To check if they are still good, look for any change in smell or texture.
Freezing Instructions
You can freeze peanut butter bars for longer storage. Wrap each bar in plastic wrap, then place them in a freezer-safe bag. They can last in the freezer for up to three months. When you're ready to eat, just take them out and let them thaw in the fridge overnight. Enjoy them later as a quick snack!
FAQs
Can I use crunchy peanut butter instead of creamy?
Yes, you can use crunchy peanut butter. It adds nice texture. The bars will still taste great. If you love a little crunch, go for it! Just keep the same amount.
What can I substitute for honey?
You can use maple syrup instead of honey. It gives a nice sweetness. Agave syrup is another good choice. Both will work well in this recipe.
How can I make these peanut butter bars healthier?
To make these bars healthier, try these tips:
- Use less honey or maple syrup.
- Add a scoop of protein powder.
- Replace chocolate chips with dried fruit.
These changes will keep the bars tasty and nutritious.
Are there any allergens to be aware of in this recipe?
Yes, this recipe contains allergens. It has peanut butter, which is common for allergies. It also includes oats and chocolate. Make sure to check for any specific allergies before serving.
Can I make these bars without oats?
You can make these bars without oats. Use crushed nuts or sunflower seeds instead. This change will alter the texture but still taste delicious.
You learned how to make tasty peanut butter bars with simple steps and tips. We covered ingredients, equipment, and variations for every taste. Remember, you can change flavors or make this recipe fit your diet. Follow these easy tips for the best results, and store your bars right. Now, enjoy the fun of baking. These bars will surely please your friends and family!