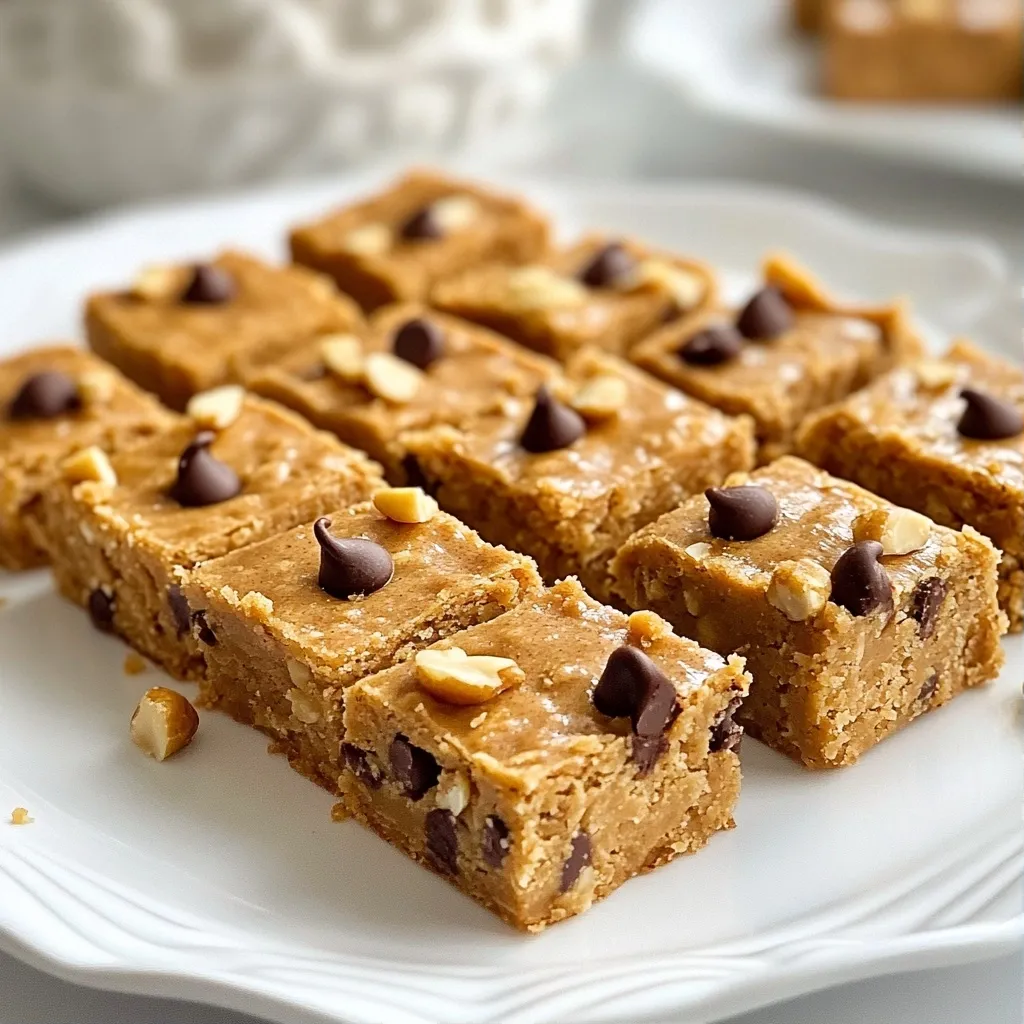
Craving a sweet treat without turning on the oven? You’re in the right place! In this post, I’ll show you how to make delicious No Bake Peanut Butter Rice Crispy Treats. With just a few simple ingredients, you can whip up these mouthwatering bars in no time. Perfect for snacks or dessert, they're quick and easy, making them ideal for anyone. Let’s dive into this tasty journey together!
Why I Love This Recipe
- Quick and Easy: This recipe comes together in just 10 minutes, making it a perfect last-minute treat!
- Nutritious Ingredients: With peanut butter, honey, and nuts, these bars are a delicious way to get some healthy fats and protein.
- Customizable: You can easily swap in different nuts or add your favorite mix-ins like chocolate chips for a personal touch.
- Perfect for Meal Prep: These bars can be made ahead and stored in the fridge, perfect for a quick snack throughout the week.
Ingredients
For these No Bake Peanut Butter Rice Crispy Treats, you need just a few key items. Here’s the list of ingredients:
- 2 cups rice cereal
- 1 cup creamy peanut butter
- 1/4 cup honey or maple syrup
- 1/2 teaspoon vanilla extract
- 1/4 cup mini chocolate chips (optional)
- 1/4 cup chopped nuts (e.g., almonds or walnuts) (optional)
- A pinch of salt
Each ingredient brings its own magic to the mix. The rice cereal gives the treats their signature crunch. Creamy peanut butter adds rich flavor and a smooth texture. Honey or maple syrup sweetens the bars naturally. Vanilla extract enhances the taste, making it even more delightful.
You can personalize your treats with optional ingredients like mini chocolate chips and chopped nuts. These extras add fun flavors and textures. A pinch of salt balances the sweetness and boosts the overall taste.
Gather these ingredients before you start. You’ll want everything ready for quick mixing. Enjoy the process of creating these tasty treats!
Step-by-Step Instructions
Preparation Steps
- In a large bowl, combine 2 cups of rice cereal and nuts if you choose to use them. Set this aside for later.
- Now, grab a medium saucepan. Over low heat, mix 1 cup of creamy peanut butter, 1/4 cup of honey or maple syrup, 1/2 teaspoon of vanilla extract, and a pinch of salt. Stir it well until it becomes smooth and creamy.
- Once your peanut butter mixture is smooth, take it off the heat. Pour it over the rice cereal. Quickly stir the mix until every piece is coated. If you like, fold in 1/4 cup of mini chocolate chips at this point for extra sweetness.
Setting and Cutting
- Line an 8x8-inch baking dish with parchment paper for easy removal. Then, transfer your rice cereal mix into the dish. Press down hard with a spatula or your hands to make it even.
- Place the dish in the fridge for about 30 minutes. This will help the mixture set and become firm.
- Once set, lift the bars out using the parchment paper. Cut them into squares or rectangles, just how you like them.
Tips & Tricks
Best Practices
- How to measure peanut butter correctly: Use a dry measuring cup. Scoop the peanut butter in, then level it off with a knife. This gives you the right amount without waste. For a smoother mix, warm the peanut butter slightly in the microwave. Just a few seconds will do the trick.
- Techniques for pressing mixture into the dish: Use a spatula or your hands to press the mixture. Start in the center and push it to the edges. Make sure it is even and flat. If you dampen your hands slightly, it helps prevent sticking.
Storage Tips
- Proper storage in airtight containers: Once cut, store the bars in an airtight container. This keeps them fresh. You can layer them with parchment paper to prevent sticking.
- How to keep treats fresh longer: Keep your bars in the fridge. They can last up to a week. If you want to store them longer, freeze them. Wrap each bar in plastic wrap, then place them in a freezer bag. This way, they stay fresh for a month!
Pro Tips
- Use Natural Peanut Butter: For a healthier option, consider using natural peanut butter without added sugars or oils; it will still give you that rich flavor.
- Customize Your Mix-ins: Feel free to get creative with your mix-ins! Dried fruits, seeds, or even coconut can add a delicious twist to your bliss bars.
- Press Firmly: When transferring the mixture to the baking dish, make sure to press down firmly to compact the ingredients; this will help the bars hold together better.
- Storage Tips: Store your bliss bars in an airtight container to keep them fresh; for extended shelf life, consider freezing them for up to three months.
Variations
Ingredient Swaps
You can easily switch some ingredients. If you want a nut-free treat, use almond butter instead of peanut butter. Almond butter has a nice flavor and works well.
You can also change the sweetener. Instead of honey, try agave syrup or brown sugar. Both options add sweetness and adjust the dish to your taste.
Flavor Add-Ins
Want to make your treats more exciting? Add dried fruit or seeds. Dried cranberries or raisins add a sweet chew. Chia seeds or sunflower seeds boost nutrition too.
You can also mix in different types of chocolate. Use dark chocolate for a richer taste or white chocolate for sweetness. You can even swirl in a chocolate spread for extra fun!
FAQs
Common Questions
Can I make these bars vegan? Yes, you can make these bars vegan. Just swap honey for maple syrup. Use a vegan chocolate option if you want to add chocolate chips. This way, you keep all the yummy flavor but stay true to a vegan diet.
How long will they last in the fridge? These treats will last up to a week in the fridge. Store them in an airtight container. This helps keep them fresh and tasty for longer. You can enjoy them each day without worry!
Troubleshooting Issues
Why are my treats not sticking together? If your treats are not sticking, you might have too much dry cereal. Make sure to measure the rice cereal correctly. Also, ensure you mix the peanut butter blend well with the cereal. Pressing the mixture firmly into the dish also helps.
How can I make them more chocolatey? To make your treats more chocolatey, add more mini chocolate chips. You can also drizzle melted chocolate on top before chilling. This will give you that rich, chocolate flavor you desire.
Nutritional Information
Caloric Breakdown
- Each serving has about 150 calories.
- Peanut butter adds protein and healthy fats.
- Rice cereal brings in carbs for energy.
- Honey or maple syrup adds natural sweetness.
Health Benefits
- Peanut butter is rich in protein, which helps muscles.
- It contains healthy fats that support heart health.
- Rice cereal offers fiber, aiding digestion.
- It provides energy for active days, especially for kids.
These easy snack bars use rice cereal, peanut butter, and honey. You learned how to mix the ingredients and make great bars. We explored tips to store them and keep them fresh. You can also swap ingredients for new flavors and nutrition.
These bars are customizable and fun. With simple steps, you can whip them up anytime. Enjoy your tasty, healthy treat!